Sunday, November 30, 2008

Pillow Finishing Tutorial

Now that you have your supplies gathered, we are ready to start making a pillow!

All of these instructions are written to create an envelope style cover to put over a pillow form. However, if you only want to make a small pillow, you could leave off the large border. If you want to stuff your pillow instead of using a pillow form, you would make a one piece back and leave an opening to turn and stuff your piece. The basic principles are the same, so you should be able to modify to suit your needs. Personally, I do like to make the envelope style pillows and use a pillow form. This eliminates storing bulky pillows, and allows me to switch out the covers with the seasons.

The first thing that you need to do is draw out your dimensions. I strongly suggest that you don't skip this step if you are planning to use a pillow form! (Even though I drew mine out, I still messed up...hence the delay in getting this posted...and an unplanned extra border around the edge).

You will need to decide how big your finished pillow should be. That will drive all of the other measurements. I used 0.25" seam allowances throughout this project. I used a 14" pillow form, so the size of my front piece needed to be 14.5" x 14.5", which is the 14" finished size plus 0.25" seam allowances all around (to allow for attachment of the back panel).

Here is what my diagram looked like:

Here is how I figured out the finished sizes and cut sizes:
Section A - Stitched Design Area: My stitched design size was 4.0" x 4.0". I wanted to leave a 0.25" margin around my stitching. I allowed 4.5" x 4.5" for the design portion (4.0" stitched area + 0.25" margin on each side). The cut area needs to be 5.0" x 5.0" to allow for the above finished size, plus a 0.25" seam allowance on all sides to attach to Section B.

Section B - Narrow Border Area: I wanted to have a 1.0" border all around the stitched area. The cut size of the strips for this area needed to be 1.5", which is the 1.0" finished size, plus a 0.25" seam allowance to attach to Section A and 0.25" seam allowance to attach to Section C.

Section C - Wide Border Area: This area is flexible based upon the finished size. The total width and height of the front needs to be 14.5" as discussed earlier. This measurement includes the 0.25" seam allowance on each side to attach to the back. The finished size of this area will be 14.5" total minus 4.5" (A) minus 2.0" (B on two sides) divided by two (top, bottom) = 4.0". The cut size for the strips in this section needed to be 4.25". This is for the 4.0" size just calculated, plus 0.25" to attach to Section B. The seam allowance to attach to the back was already taken into consideration when calculating the 14.5" total size of the front.

Hopefully that all makes sense. Draw yourself a diagram, and calculate carefully. Be sure to do your finished size calculation first, and then do the cut size calculations.

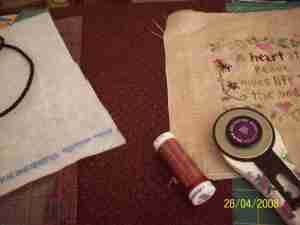
Now that you have your diagram finalized, it's time to get down to work. First, we'll cut the stitched piece to the correct size. I like to do this by pulling threads to make a visible cutting line. This ensures that you are starting with a nice, straight edge. Measure 0.5" from the top edge of the stitching. The 0.5" is for the 0.25" border, plus the 0.25" seam allowance. Pull out the horizontal thread closest to 0.5".

You could also count threads rather than measuring. For example, if you stitched your piece on 28 count, you would count out 14 threads and pull out the 15th thread. Repeat all around the piece. Cut out your piece using space left by the pulled threads as a guide.

Cut your strip of fabric for Section B, using the cut size width that you calculated for this section. Don't worry about the length. When I cut my stips, I just cut the appropriate width of fabric and for the length I went from selvage to selvage. One strip was plenty.

Cut your strip of fabric for Section C, using the appropriate width that you calculated for this section. Again, cutting from selvage to selvage gave me plenty of length.

Iron your stitched piece and your strips of fabric. The good news is that the hard part is over, and we're ready to sew!

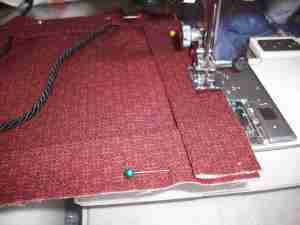
Start at the top of your stitched piece. Pin the right side of your Section B strip to the right side of your stitched piece. Cut off any excess length even with the edge of the stitched piece.

Sew a 0.25" seam. Repeat at the bottom edge of your stitched piece. Iron the seams open.


The front of your piece should look like this:

Attach the Section B strips to the sides. Iron your seams open.

The front of your piece should now look like this:

Repeat the steps to attach the Section C border. Your piece should now look like this:

Important! Measure your piece, and make sure that it is somewhat close to what you calculated. I messed mine up, because I had forgotten about the seam allowance to attach the front to the back. I had to sew a little strip all of the way around, so in the following pictures you will see an extra brown border. I wasn't thrilled about this, but it turned out okay. Now is the time to make any corrections, if you miscalculated.

Cut your back pieces. You will need two pieces. The width should be the same as your front. The length should be about 70% of your front. Hem one edge of each of the back pieces. I like to use the selvage edges for this, and fold up about an inch and sew it down. If you don't have a selvage edge to work with, you will need to do a double fold and sew it down.


Lay your front piece face up.

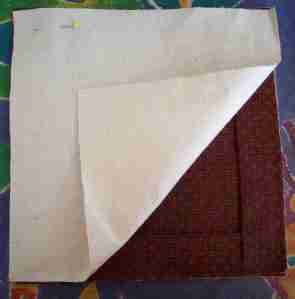
Lay one of your back pieces face down on top of your front piece. Line up the unfinished edge of the back piece with the top of your front piece. The hemmed edge should be towards the middle of the piece. Pin.

Lay the other back piece on top of your front piece, lining up the unfinished edge with the bottom of the front piece. Your two backing pieces will overlap. Pin.

Sew all of the way around the piece, using a 0.25" seam allowance.

Turn right side out.

Insert your pillow form into the "envelope" opening in the back. Stand back, pat yourself on the back, and admire your finished pillow!

If you have any questions, please contact me and I'll try to help :)
Tuesday, November 25, 2008

Supply List - Pillow Finishing

Alright, everyone! It's time to gather up your supplies for a pillow finishing frenzy this weekend. I will be posting instructions on how to do either a small pillow, or a larger pillow with a flap back that you can use with a pillow form (and swap out throughout the year).

The supplies needed are pretty basic:
Stitched piece
Poly-fill stuffing or pillow form
Sufficient fabric for finishing your piece (depends upon your desired finished size) *
Sewing thread to match your fabric

Tools needed:
Sewing machine
Rotary cutter and ruler (not essential, but it sure makes everything easier!)
Scissors
Sewing needle

* Notes on how much fabric to buy: A fat quarter is generally more than plenty to do a small pillow. For the larger pillow, you will need to measure your stitched piece and pillow form. For the front, you'll need to have enough fabric to cut 4 strips to get you to your finished size (leaving the seam allowance). You will also need enough for your back, with extra for overlap. If you have any specific questions, e-mail me and I'll try to help :)

Gather your supplies, your finished-unfinshed pieces of stitching, and get ready to have fun this weekend!

Sunday, September 21, 2008

Gallery - Needlebook

Finished by Barbara J
(Full blog post found here)

New tutorial links added

The latest tutorial links to be added are:
Have a great week! :)
Gallery - Seen on the Blogs

I have tried to keep a note over the last 12 months when I saw mention of a finish made using one of our Focus on Finishing tutorials - I have since been in contact with the stitchers on my list, and have heard that it's OK to post piccies of their finishes on the blog ... so, here's a bit of eye candy that I hope you will enjoy (hopefully there will be another post over the next week once I hear back from a few more people) :)
Flanged Pillow Tutorial


Finished by Jenna
(full blog post is found here)
Stitcher's Bourse Tutorial


Finished by Terri for Melissa
(full blog post is found here)


Finished by Jeannie-Marie
(full blog post is found here)

Beaded Scissor Fob Tutorial


Finished by Dawn B
(full blog post is found here)

Needleroll Tutorial


Finished by Kim B
(full blog post is found here)

It's particularly good for the tutors to see that their classes are being used - and don't forget, if you have some finishes to share we'd LOVE to see them here too! All you have to do is to drop me an email with your Blogger details, and I can add you as an author :D

Tuesday, September 16, 2008

Latest Tutorials added

I've been very lazy in adding the latest tutorials I've been made aware of, but finally they're added and ready for you to share (if you haven't already seen them, of course):
If you come across any other tutorials you think would be a good addition to the tutorial list, please don't hesitate to let me know. Also, if any of the links are no longer working please let me know so I can remove or update the link.

Have a great week :)


Sunday, September 14, 2008

Blog Awards

I have been very lax in thanking a couple of people who have nominated our blog here for an Award in recent months - and today is the day to rectify that:


First of all, thanks go to Sandra, Nela and Lisa who awarded the blog with the Brillante Award.


Here is what Sandra and Lisa had to say about the blog:

Sandra: Focus on finishing: I don't know these bloggers personally (Anne and Karen are the managers), but my life has been saved thanks to its posts lol I think it's a huge reference for cross stitchers and needlepointers. Lots of useful and easy to follow tutorials with pictures.


Lisa: Anne S-not new to me, but as busy as she is continues to provide us with the Focus on Finishing blog with tons of contributions from stitchers from all over the world chock full of complimentary tutorials. "Hi Anne!"


Then Ezia kindly awarded us with an Arte Y Pico award.


With the acceptance of these awards, are some rules, which are to then nominate at least 5-7 other people for these awards. Because this is more of a 'public' blog, not a personal one, I hope you don't mind if I don't do that here ... instead I will try to continue to highlight some great blogs regularly that have some great finished items on display :)


Thanks again ladies, though, for the lovely awards - the feedback we get every now and then makes it feel worthwhile :)


And on that note I will walk away from the blog tonight, after spending the entire day working on its contents. I've copied so many posts over they've started making me complete a word verification after every post, so I think it's time to call it a night (apart from the fact my eyes are now getting blurry - I guess that means no stitching for me tonight LOL).

Kind regards,

Welcome to Focus on Finishing!

Welcome to the new-look Focus on Finishing blog!

This blog was originally set up in Wordpress, but posed a difficulty for stitchers and tutors wanting to contribute, as the Blogger platform is more commonly used than WP. Some pages, however, will remain within the original Wordpress blog, as they are maintained by me and WP is my preferred platform.

This blog was created as a resource both for stitchers who already enjoy finishing their own stitching creatively and want to develop and share their skills and also for those stitchers who would love to do so but don't know where to start.

It aims to be a place where you can learn new techniques, receive and give finishing help and advice and share pictures of your finished items with everyone.

It also aims to provide a centralised information resource of finishing techniques, with pages dedicated to both tutorial links and links to websites/online albums for inspiration.

We hope to continue to organise regular finishing classes where people can learn specific finishing techniques. All tutors who put together the tutorials do so on a voluntary basis, and I am indebted to their assistance in keeping this blog active by continuing to provide some high quality and wonderful tutorials for us all to enjoy and learn from. More information can be found on the Class/FAL schedule page.

When the blog first started back in February 2007 we tried to have regular FALs (Finish-A-Longs), where we set aside a certain time every week or month to finish up some of those stitched-but-not-yet-finished projects using any method. Unfortunately, there were no takers, so this was cancelled. If enough people would like to have a weekend set aside for finishing, I am happy to start the ball rollling once again.

If you wish to contribute to this blog as a poster rather than just a commenter, please email me (Anne) with your details (including the email address you use for Blogger posts) - I will then add you as a contributor so you can post your finished piccies etc.

When you post to the blog, please assign one or more relevant labels to your post. It is preferred the label should describe the type of finishing method you have used (eg Pinkeep, Bookmark, Biscornu, etc), and any personal details you wish to add. This means that all the posts will be searchable by category, thus making it easy to find all posts on the same subject. If there isn't a label available that is relevant to your post, feel free to create one. Please note that labels may be edited to ensure consistency and categories may be added to posts where necessary.

We would LOVE to see any finished items published to the blog where you have used our tutorials - this is a great motivation for other stitchers, as well as for the tutors that have taken their time to prepare their tutorials for your use.

Welcome again to the Focus on Finishing blog - I hope you enjoy your time here!

Sunday, August 17, 2008

A Needle Case for your needle packets

Who doesn't need a special something to hold their needle packets? Since I use a lot of different types of needles in my embroidery, I like to keep them in their packets. I've made a needle case to organize my packets that will help me find the needles I need easily.

To make the needle case, you'll need:
  • your finished embroidery, 12 inches long by 6 inches wide
  • light weight cotton for the lining, 27 inches long by 6 inches wide
  • #12 perle cotton
  • a small length of ribbon
  • 2 pieces of skirtex or light weight cardboard, 5-1/2 inches by 5 inches each
  • a hot iron
I stitched a stumpwork design for my needle case but the finishing instructions will work for surface and counted embroidery, including cross stitch and crazy quilting.

I hope you will enjoy making your own needle case and will find this tutorial useful. If you have any questions or need clarification on any of the steps, leave a comment here and I will try to answer in this section for everyone's benefit.

Tutor = Celeste

Sunday, July 13, 2008

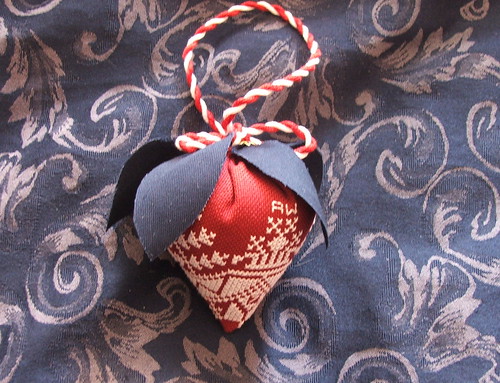
Strawberry Fob Finishing Class

Summer Quaker Strawberry for Amy in SC

Hello all,

I'm running a bit late this month but have finally cobbled together some photos and text for Strawberry fob finishing.

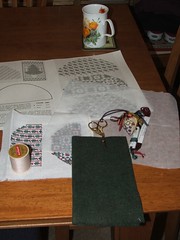
First gather your equipment...

first gather your equipment

For this project you will need:

  • Stitched project - some suggestions: Prairie Schooler chart 100 - American Strawberries & chart 101- Prairie Strawberries (used for this tutorial), Anita's little Stitches designs, Blackbird Designs - there is a strawberry fob in the Secret Garden pattern (OOP) from the Loose Feathers series of 2006 and a Blackbird Designs also designed a fabulous quaker strawberry for the 2006 Annual Just Cross Stitch Christmas Ornaments issue (I'm sure this one is still available).

  • Interfacing

  • Ribbon, felt

  • Stuffing

  • Scissors, needle, thread, pins.

  • Iron

And you can see in this photo, I also made sure I had a cup of tea to work with.
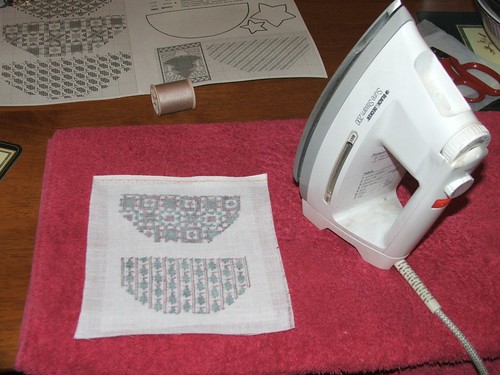
Iron on the interfacing on the reverse side of your stitching
Take your stitched piece and iron a piece of interfacing to the reverse of the stitching.
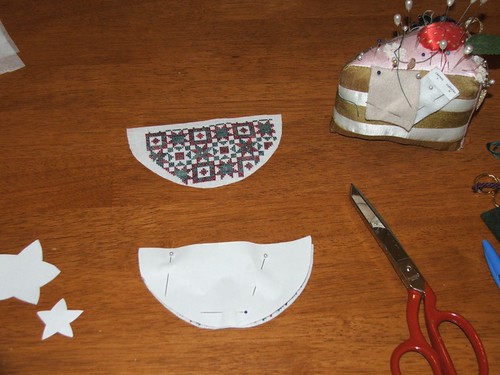
pin the template on and cut around
Make a semi-circle template, pin to the stitching and cut around. You can see I have mucked up centering this up with the "quiltish" strawberry above - this is not really a problem for this finishing technique.
fold and finger press the straight seam
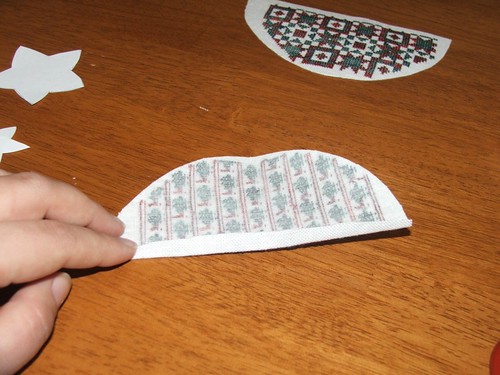
Next, finger-press a small seam along the straight edge. Make this seam as close to the stitching as possible.
use a ladder stitch to join the straight seams
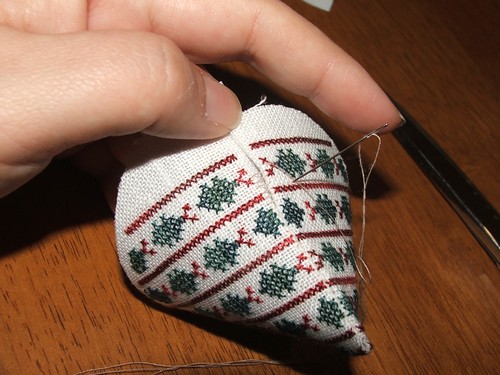
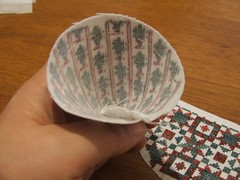
Fold the semi-circle to form a cone (see above). Stitch the straight seams together. I like to use a ladder stitch to do this, but you can use a sewing machine if you wish (I find it is easier to do this by hand).
you might be able to make out the ladder stitch from this photo
I kinda hoped you'd be able to see the ladder stitch in this photo. If you pull it nice and tight it disappears into the seam. I'm pretty pleased with the join for this strawberry.
run a gathering stitch around the edge of the cone shape
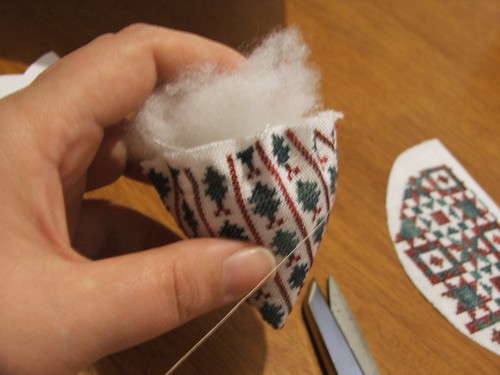
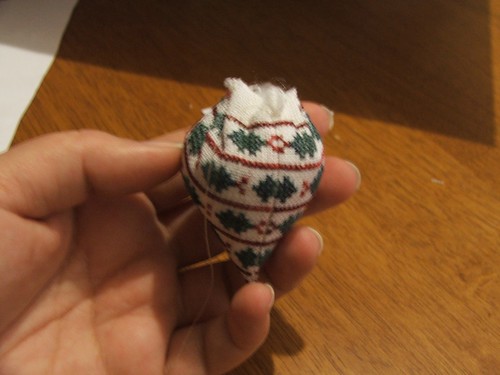
If you used the ladder stitch to join the seam, secure the thread and then run a gathering stitch around the top of the cone around 1/2 an inch from the top.
add stuffing and pull the running stitch gather.
Draw the gathers together a little and stuff your strawberry - I've used hobbyfill.
gathering the top of the strawberry
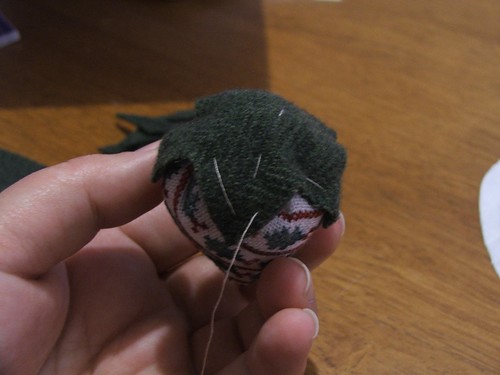
Draw the gathers tighter and run a few stitches across the "opening" and pull these tight to secure your thread. You can insert a hanger at this point if you wish, stitch through it as you secure your thread.
Top of the strawberry with felt cap in place, tacked down.
For my first strawberry, I've attached a felt cap. I cut the felt out using the template in the pattern (Prairie Schooler pattern 101: Prairie Strawberries) and tacked it to the strawberry.
sewind down the felt cap
Next, I stitched around the felt using a buttonhole stitch - making sure I caught the linen beneath. Then I attached the second felt star (template from the prairie schooler pattern) using buttonhole stitch.
felt wool cap all complete
Attach a hanger to the top. I made a loop of ribbon and secured with tiny tacking stitches and slipped a bead over the ribbon to hide the stitches.

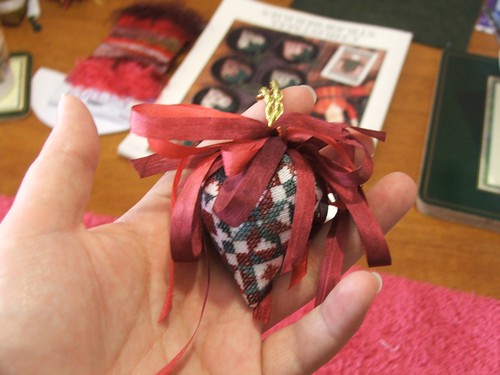
Another pretty way to finish the strawberry is to tie ribbons around the hanger - I learned this technique from Janie Hubble from The Cat's Whiskers Design Studio at a class last year.

attaching hanger and first ribbon bow for a ribbon capped strawberry
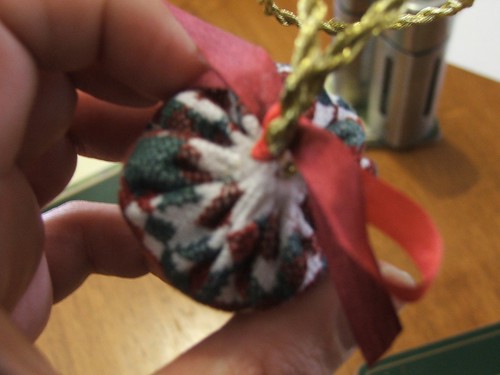
Here's the other design I stitched from Prairie Strawberries by Prairie Schooler. You can see in the photo I have gathered the top and inserted the hanger. I've cut a length of ribbon and tied it in a bow around the hanger. Just keep tying bows around the hanger - pushing them down towards the strawberry. Have them facing in different directions.
ribbon cap all done
When you are satisfied with the ribbons, trim the ends and you are done.
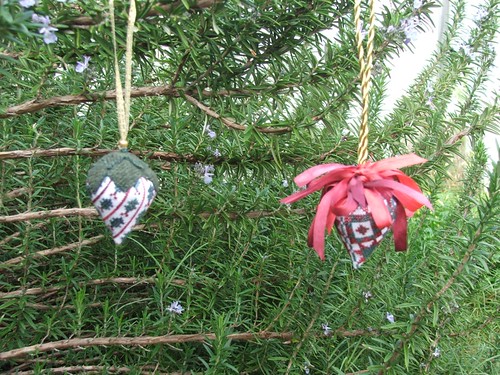
The completed strawberries out in my little garden
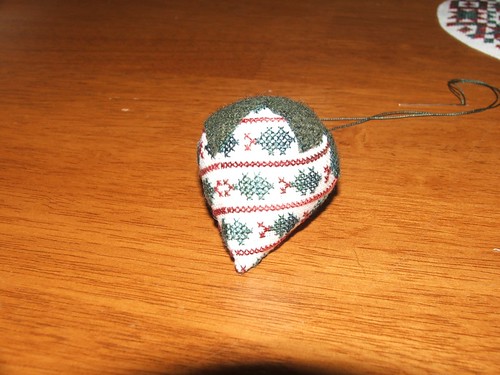
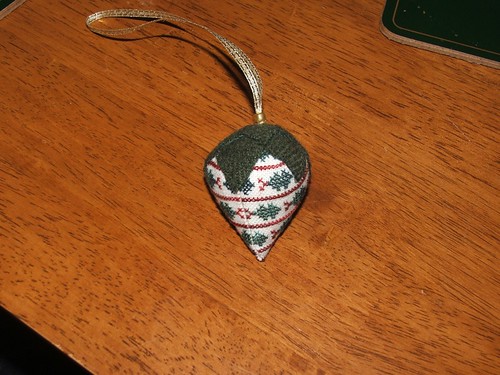
Here are the two finished strawberries. I love them! - So cute!
I hope you will enjoy making your own strawberries too and will find this tutorial useful.
Cathy.

Tutor = CathyMK

Friday, May 16, 2008

Treat Bag Class

Here is the wonderful Treat Bag Tutorial put together by Celeste - I think you'll all agree that it's a real stunner, and the instructions put together are superb!

Due to the difficulties of learning to use the Wordpress platform, and to allow us to get this published on time, this tutorial has been prepared in a .pdf format. Hopefully I can work out myself how to get this file attached here so you can download it! ;)

As always, please feel free to leave any questions and/or feedback in the comments section of this post.

Enjoy! :)


Tutor = Celeste

Saturday, May 3, 2008

Tuck Pillow - Class

Welcome to our tuck pillow tutorial.

This tutorial will be for a 7" flat door hanger tuck pillow but you can make yours any size you like. Smaller tuck pillows are good for Christmas ornaments. To recap, following is a list of what you need to make the pillow.

  • your stitched piece

  • main fabric for pillow - a fat quarter will be plenty

  • neutral fabric for back of opening - a scrap piece the size of your pillow. I use calico/quilters muslin/homespun or whatever it’s called in your country.

  • fusible fleece wadding - the width of your pillow. I use fusible fleece on my pillows as I prefer the finish it gives to the back of the pillow. You can, of course, use any batting you prefer. Something not too thick is best.

  • cord for hanging

  • sewing machine

  • thread

Cut 1 piece of main fabric 7½” by 7½" for the back

Cut 1 piece of neutral fabric the same size

Cut 1 piece of fusible fleece the same size

Cut 4 strips of main fabric 7½” by 2½"


Fuse the fleece onto the wrong side of the main fabric piece - this piece will form the back of the pillow. I always use a pressing cloth for this step. If you are using a non-fusible batting, pin the batting to the wrong side of the main fabric piece & sew using a ¼” seam. Now treat this piece as one.


Fold the 4 strips of main fabric lengthwise, wrong sides together. Press.


Place 2 of the strips onto the top and bottom of the right side of the back pillow piece, raw edges together (the folded edge will be in the middle) & pin.


Place the other 2 strips on the sides of the right side of the main piece & pin. Do not sew yet!


At this time, you will add your hanger. First of all you need to ascertain which edge is the top of your pillow (this is only crucial if your pillow is rectangular or the fabric strips/main fabric have a one way design). Pin your cording piece between the strips and the main fabric piece making sure the cording loop is in the middle of the pillow, NOT poking out through the seam - the ends WILL be poking out of the seam and will be trimmed later (see pic for clarification).


Now sew all these pieces together using a ¼” seam. To ensure the cording stays put, you can backstitch over this part or sew that part of the seam again to reinforce it.


Place the neutral fabric and main pillow piece right sides together with the strips sandwiched in the middle and pin.


Now sew these seams using a ¼” seam, leaving an opening for turning. Trim the seams, corners & cording.


Now turn the pillow right side out and VOILA, your very own tuck pillow!


You may, if you wish, whip stitch the opening (which will now be situated inside the pillow) closed. However, I usually just leave it as no one can see it. Give the pillow a good press to make it nice and flat.

Now you can add your finished cross-stitch piece which, hopefully, will fit into the opening. You can secure it with buttons at the corners or just leave it. I find that the stitched piece doesn’t move much unless the cat gets at it & gives it a bat!


Calculating other sizes of pillows


To calculate a different pillow size, all you need to do is measure your finished cross stitch piece and add 1½” to all sides. That measurement will be your main fabric and batting size and strip length. The width of the strips will be 2½”.

Keep in mind that the larger you make your pillow, the wider the strips should be. This, in turn, will also affect the size of the opening so double check that your stitched piece will fit!


Tutor = AlisonC
 

Made by Lena