Friday, March 21, 2008

Book Cover - Class

Hello everyone! I hope you've got the items ready. Here's a recap:

img_0416.jpg

You will need the following items:
  1. A stitched piece, size ½” to 1” allowance around the front of your book or a part of it if you prefer.
  2. Some coordinating fabric for the side, back and inside flap of the book.
  3. Muslin or calico for the backing
  4. Book to cover ;)
  5. Matching sewing threads
  6. Ribbons to tie (optional)
Instructions for a particular step will be at the bottom of the picture (if any).

Step 1

img_0419.jpg

Determine the size of your stitched piece that will cover the book and pull one thread from each side of the stitched piece. This will help to ensure the lines that you machine sew are straight. The stitched piece can cover the front of the book or partially or cover the front and back of the book. It’s up to you. In my example the stitched piece covers the front of the book partially.

Step 2

img_0423.jpg

Measure and cut the length and width that you will need to cut from the co-coordinating fabric. Wrap from the left edge (where one thread was pulled) to the back of the book. Add necessary seam allowances on all sides. Machine sew the coordinating fabric and the stitched piece. Iron open the seam.

Step 3

img_0424.jpg

Cut 2 additional pieces of the coordinating fabric about ½ the width of your book, add necessary seam allowances. Machine sew one edge of both the flaps after measuring and ironing a double seam.

Step 4

Cut the backing fabric the same size as the cover piece.

Step 5

img_0428.jpg

Sewing them all together. Lay the cover piece right sides up. Place the flaps, wrong side up on the both sides of the cover piece with the stitched edge towards the middle. Pin accordingly.

Step 6


img_0429.jpg

Place the backing fabric wrong side up and again pin accordingly.

Step 7


img_0432a.jpg

Machine sew from the top of the back portion of covered piece, about and inch before the flap starts. Backstitch a couple of stitches to fasten the beginning. Proceed to sew up all 4 sides but leave about a 3” opening for turning. Again backstitch when you end.

Step 8

img_0436.jpg

Trim all sides to 1/4" and cut the corners to reduce bulk.

Step 9


img_0434.jpg

Turn the cover inside out. It’ll be a mess but nothing that cannot be ironed out :)

Step 10


img_0445.jpg

Stitch by hand to close the opening with matching thread.

Step 11

img_0437.jpg

Give it a good ironing. Insert the book covers into the flap and there you have it your very own book cover! :)

img_0439.jpg

img_0442.jpg

Optional embellishments:
  • Add a piece each of rick-rack, lace or ribbon on the sewn edge of the book flaps
  • Add two long strips each of ribbon at mid point of the right and left edge of the book for a ribbon tie closure
  • Add a small loop of ribbon/cord on the front side edge of the book and a larger loop at the back. Slip the larger loop into the smaller loop creating a closure that you can wrap around your wrist
  • Add a ribbon/cord for bookmark where the opening was and stitch by hand or securely by machine.
  • And anything else you can think of!
Samples of book covers:
If you have any questions please feel free to comment here and I will answer them in the comment section itself so as to centralise the Q&A for everyone's benefit.

Thank you all for joining our tutorial this weekend. Pictures are always welcomed :)

Tutor = Barbara J

Wednesday, March 12, 2008

Needlebook Class

Making a needlebook really isn't all that difficult. Here are my step-by-step instructions for making a needlebook:

Materials Needed:

• Whatever you'll be using for your stitched piece. You choose the design, fabric, embellishments, etc. Stitched pieces should be approximately 3-4" square. If you want the back cover stitched, you'll have to take that into consideration also. Size is approximate. You can make it larger, smaller, rectangle, square, etc. It's up to you!

• Coordinating cotton fabric of your choice. I've found that the quilt fats (18x22" fabric) are perfect. Or look in the odds and ends bin at the fabric stores to see if there's anything that might work. If you want pockets on the inside of your needlebook, you'll need two pieces of fabric. This is the fabric that will go on the inside of your needlebook, so the size depends on the size of your stitched piece, and whether or not you stitched a back cover.

• Matching 1/4" ribbon. Shouldn't need much more than 14".

• Flat quilt batting - again, the amount depends on size of needlebook. 1/4 yd. should do it.

• Piece of coordinating felt. 5x8" piece should work.

• Coordinating thread to sew it all together.

• Scissors to cut fabric, batting, and felt.

• Sewing Machine. You can sew it together by hand, but a machine makes it go faster and easier.

• Iron

Step One:
Decide on what to stitch for your needlebook cover.


Step Two:
Choose coordinating fabrics for the back cover and inside cover. Cut the back cover the same size as the front cover. Cut the inside cover the same height as the front/back cover, and twice as wide minus 1/2". Cut the quilt batting the same size as the inside cover (Quilt batting not shown in pic). Press all the pieces with an iron, except for batting.


Step Three:
Take front cover and back cover and place right sides together. Stitch right hand side with 1/4" seam allowance.


Step 4:
Press seam open.


Step Five:

Here's where the fun part starts! Assemble your pieces. Front/Back Cover, Inside Cover, Batting, Ribbon.

Note: If you want to put pockets inside your needlebook, you will have to cut a piece of fabric the same width as the Inside Cover, and 2/3 the height PLUS 1/2". Fold 1/2" to the wrong side of the fabric, along the LONG edge. Press flat with iron. On the same long side of fabric, stitch a seam 1/4" from folded over edge. Place Pocket with right side down on table. Place Inside Cover on top with right side down, matching bottom edges. Make 1/4" seam on each short edge. The drawing shows what it should look like with the right side facing you. (There are no pics because I didn't put pockets in this one).

Take your Inside Cover and place it right side down on table. Place batting on top. Set aside.


Place your Front/Back Cover right side up (stitching facing you). Cut two pieces of ribbon 6-8" each. Place ribbon on right and left side of cover. You may want to (temporarily) pin the ribbon in place. There are no pics of this part because I forgot (!!!) to put my ribbon on and had to improvise. However, I have relied on my artistic talents to draw a diagram.


Place the Inside Cover/Batting on top of the Front/Back Cover and Ribbon. You may want to pin all three layers together to make sewing it together easier.


You will want to leave a 3" opening at the bottom of your needlebook so that you can turn it inside out. Notice where I started my seam?


Stitch 1/4" seam all the way around the edge of the needlebook, stopping about 3" from where you started. Notice where I stopped?


Once the sewing is done, you can remove the pins. This is what your needlebook should look like once you've sewed the outside seams.


Trim the batting close to the seam. Be careful not to cut the fabric. Once you've trimmed the batting, cut the corners at an angle. This is what it should look like.


Step Six:
Carefully turn your project inside out. Your Front/Back Cover, Inside Cover, and Ribbons should be on the outside. The batting should be on the inside. To help get your corners "pointy", use a slim object to push them out. I used a wood skewer. You can also use a knitting needle, crochet hook, pen with a cap on. Be careful not to poke the object through the fabric.


Using the iron, press the front and back of your needlebook. You will have to tuck in the fabric where the opening is at the bottom of your needlebook.


Step Seven:
Take needle and thread to sew the opening closed. Press both sides of your needlebook again.


Step Eight:
Cut felt 1/4" smaller than the inside of your needlebook. One piece of felt will make 2 pages. If you wish to have 4 pages, cut 2 pieces of felt. I personally wouldn't do more than 4 pages as it would make the needlebook pretty bulky. Optional: I used pinking shears to cut the edges of the felt.


Place felt in the center of the needlebook. Use pins to hold it in place.


Place needlebook on sewing machine with felt side down and Front/Back Cover facing up. Stitch a line where the front and back covers are seamed together.


This is what it should look like when the felt page(s) are stitched in.


I hand-sewed on the gold cording to match the closure. Tie the ribbon and viola, you have a finished needlebook!


Here are other needlebooks I've made:
Je Brode/I Embroider
Friendship Grows

Here are needlebooks created from my tutorial: More Needlebooks

If you have any questions, feel free to email me at mearitaira@yahoo.com.

Tutor = Meari

Saturday, March 8, 2008

Bookmarks are not Boring! - Class

Bookmarks don't get enough credit, IMHO. They're a great way to show off and use a small design, they're a quick and personal gift for a friend, and they're a chance for even the most fumble-fingered finisher to express her (or his!) creativity. In this weekend's tutorial, I'm going to show you how to make three kinds of bookmarks - but don't let yourself be hemmed in by my suggestions! Your imagination is your only limitation. :)

All the pictures can be clicked for a larger, clearer image.

the standard band bookmark

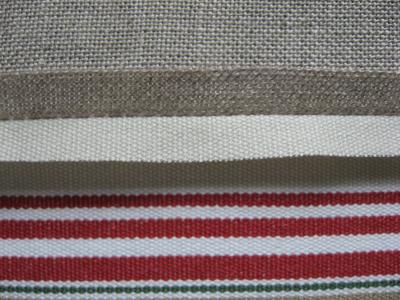
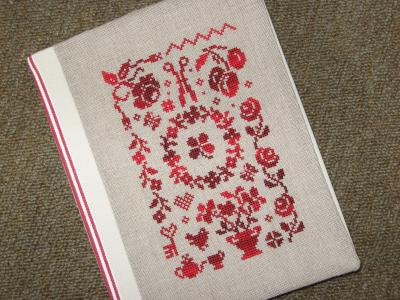
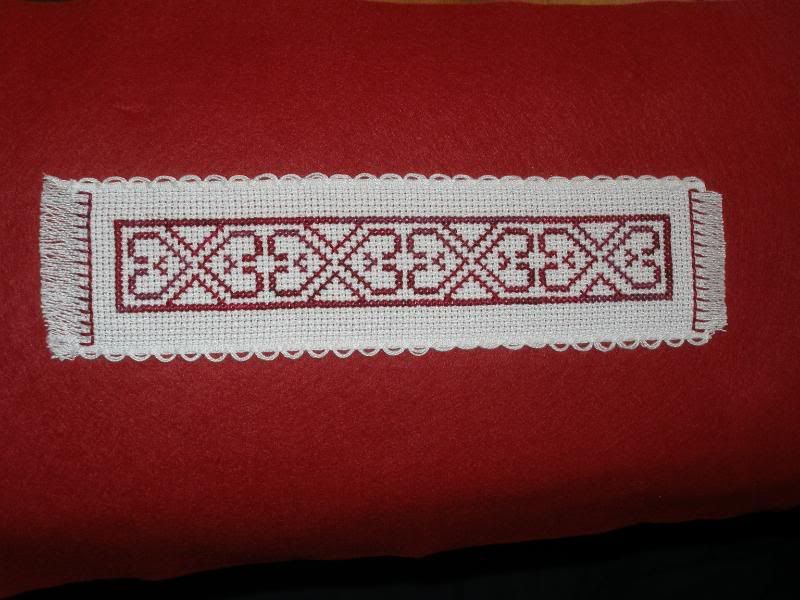
We've all seen them, we probably even have one or two of our own - a bookmark stitched on linen or Aida banding. The pre-made banding makes it incredibly easy to whip off a bookmark in an afternoon. Using scraps of linen can not only put you on your way to a tiny work of art, but can also help you make the most frugal use of those expensive hand-dyed and over-dyed linens. All you need to know is the simple hemstitch, and I'll provide some pictures that will show you what child's play this is. For this tutorial, I've used ready-made banding with hem stitching on the ends.

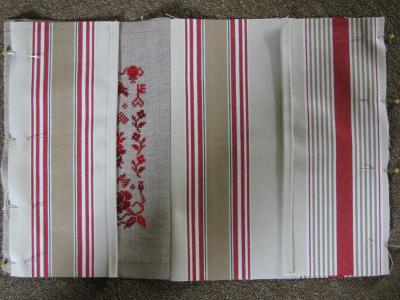
Select a pattern, or portion of a larger pattern, that fits on the fabric you'll be using. If you need it, a handy stitches-to-inches converter can be found 
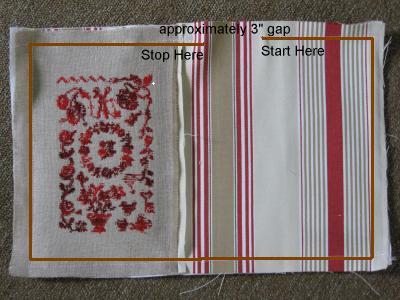
here. Stitch your design, exercising some care to center it on the long sides (where the band is closed) and to leave enough room to work comfortably on the short sides. Once you've stitched your pattern, it's time to secure the fabric so the bookmark can be used without it unraveling. I'll show you how to do this using a hemstitch. Some people prefer to sew a backing to their bookmark or iron on interfacing, which secures the fabric and also hides the backside of your stitching, but I think this is unnecessary and can make the bookmark too thick. Just keep the back of your stitching neat. ;)
the hemstitch, demystified
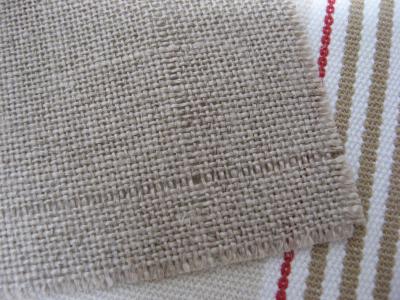
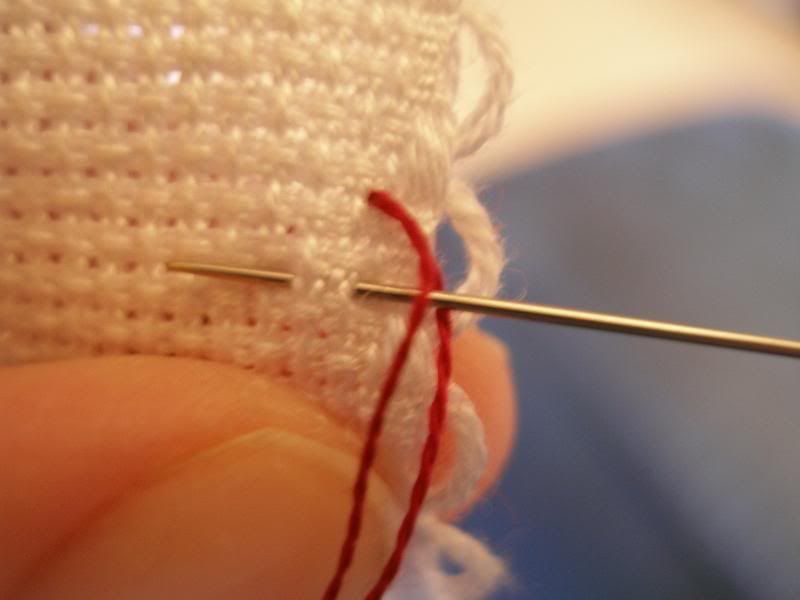
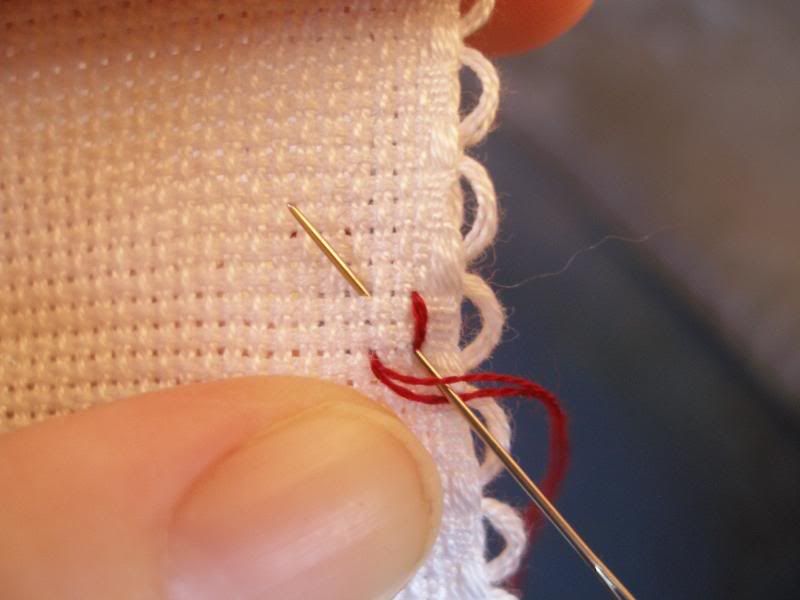
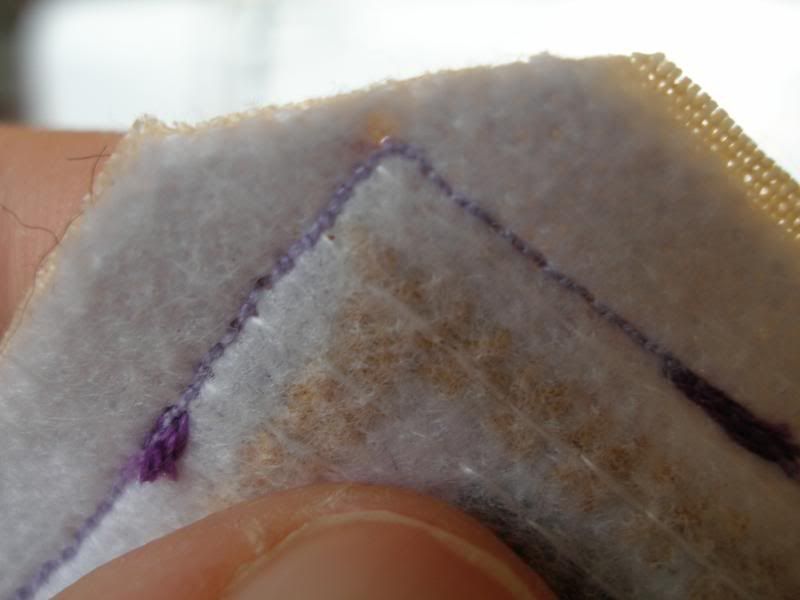
I have hemstitched two-over-two. I've railroaded my stitching to keep it tidy. To begin, bring your needle up two holes further away from where you want the solid line of the hemstitch to be, as shown int the first photo. (Note that the 'teeth' of the hemstitch point outwards from the stitched design, as shown in the 
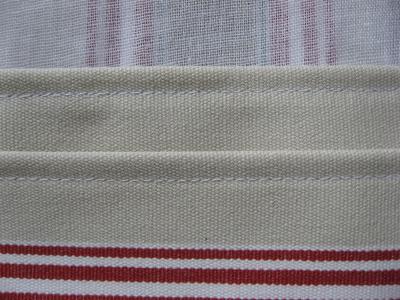
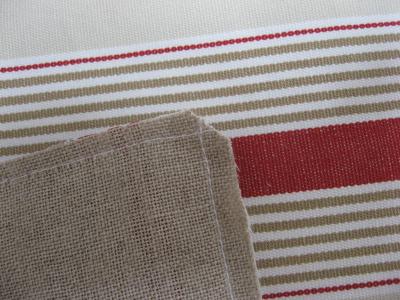
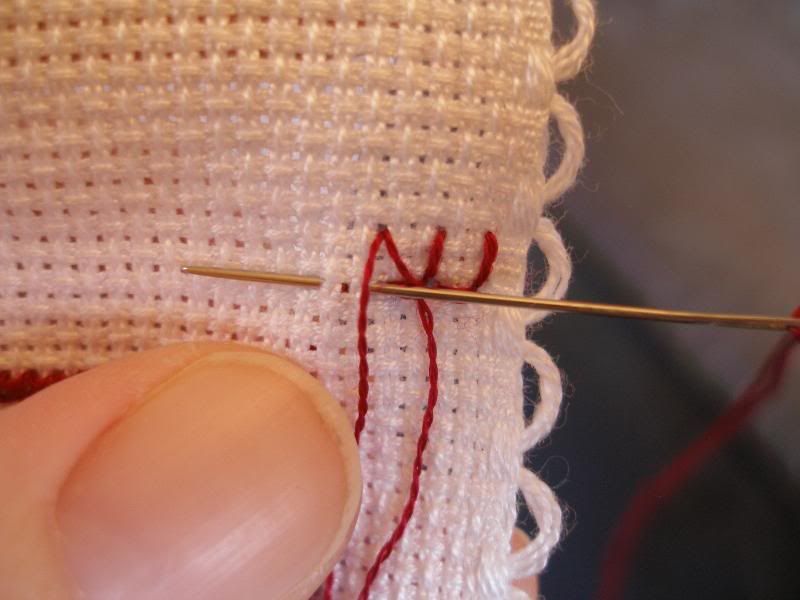
seventh photo.) For example, if you've decided to leave five stitches empty between your design and the hemstitch, you'd count out ten holes plus an additional two. On the front side of the fabric, bring your needle down two holes, slip it under the fabric and slip it back out to the front side two holes further along, as shown in the second photo. Insert your needle where it is two holes under the spot you first came up through the fabric, slip the needle under the fabric and re-emerge two holes to the side of where you initially came up through the fabric, as shown in the 
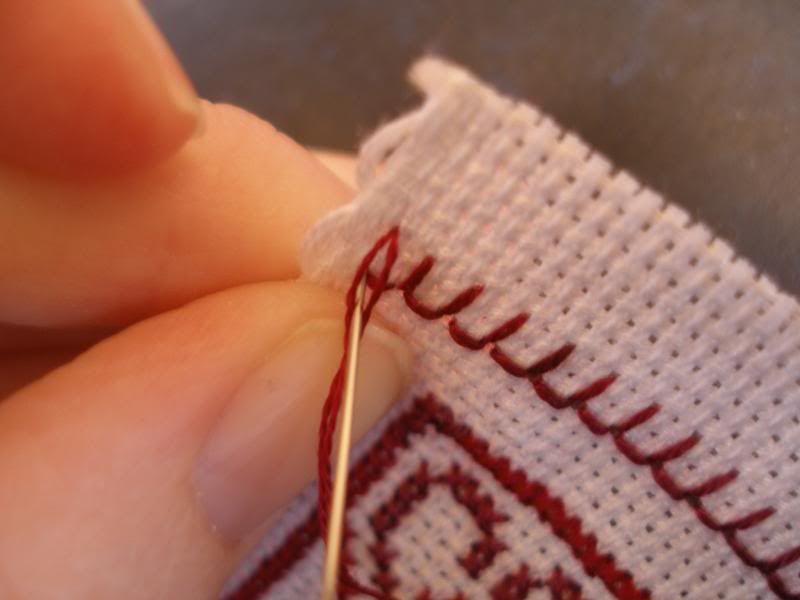
third photo. And from here on, you simply repeat the same motions until you reach the end. Watch your thread tail on the back side, adjusting it as necessary so it is held down by your stitches. When you reach the end of your row, finish with the thread on the back side and weave it under and over the stitches to secure it before cutting it, as shown in the eighth photo. You can now cut your fabric, either cutting it at the ends of the hemstitch 'teeth' or leaving a few rows to unravel for a fringe.


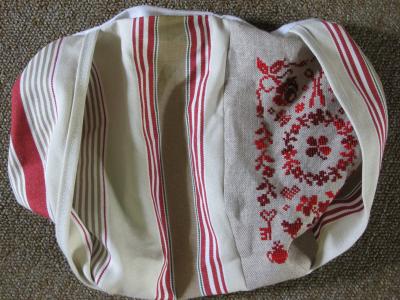
the cushion bookmark with tassel

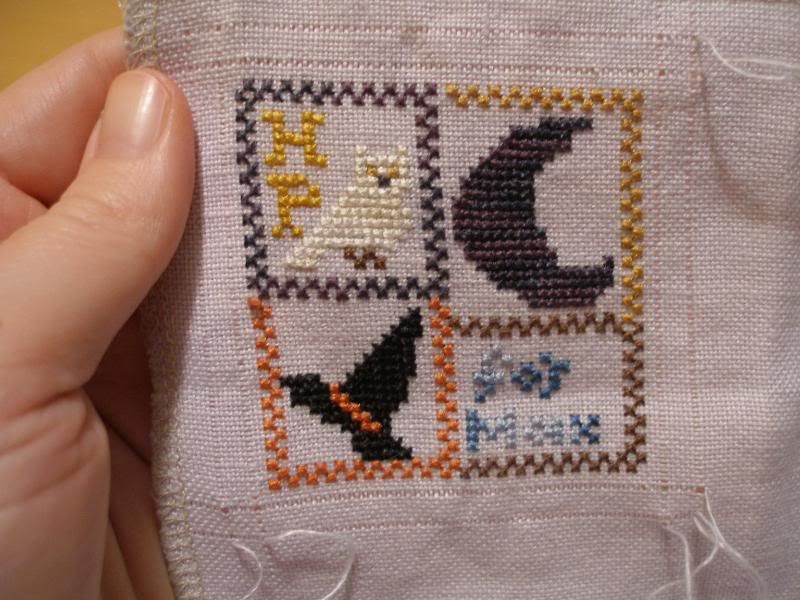
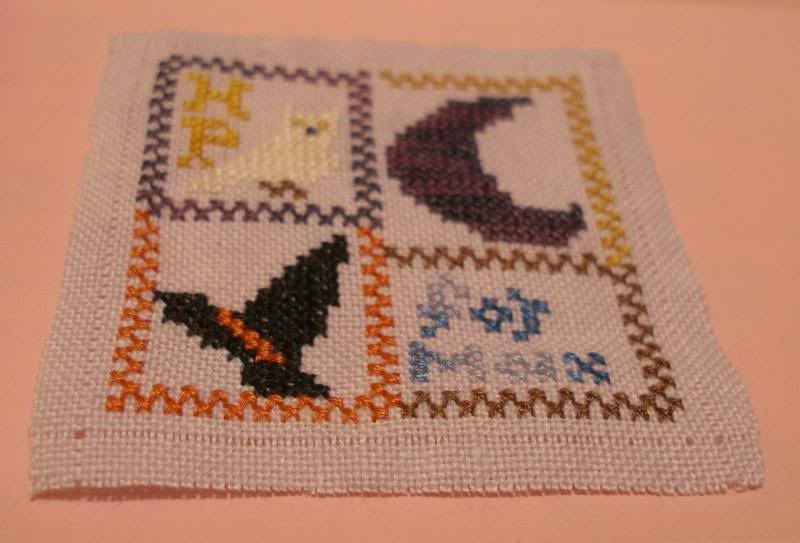
For this design, you'll need a small-ish, squarish design. I've used Hedwig's Four Patch, a freebie from 
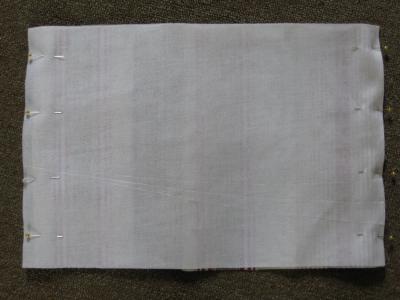
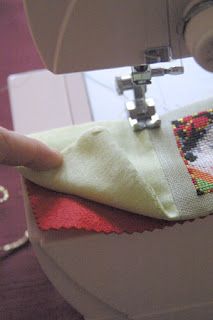
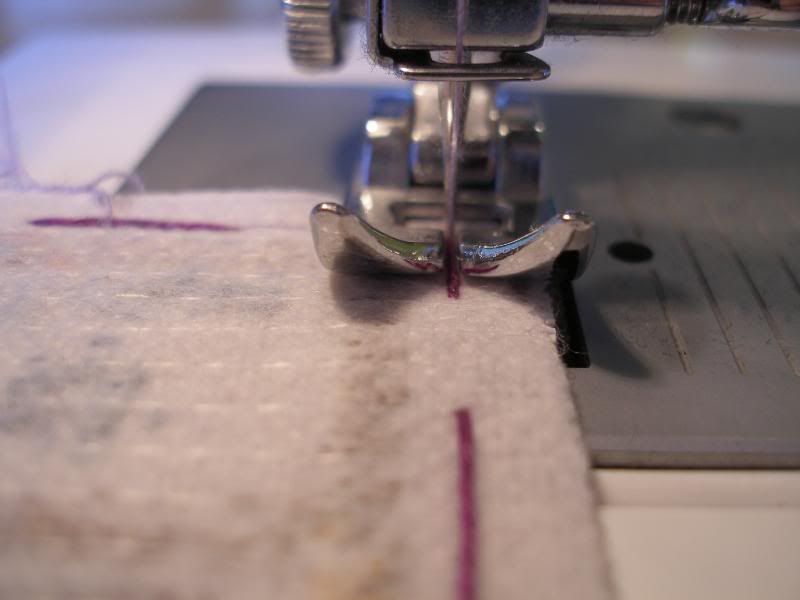
The Sampler Girl, which is 40 stitches square. I'm machine stitching mine, but you can obviously hand stitch instead. To keep everything straight, I've counted out and removed a thread along the stitch line (a handy tip I got from Isabelle) and counted out and removed another thread for where I needed to cut the fabric.


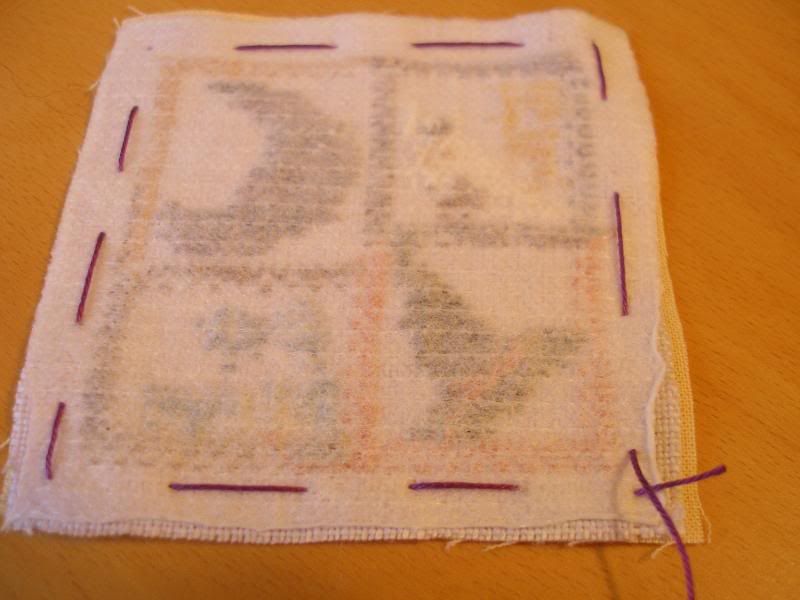
I have a backing fabric of a similar size. Because pins make the fabric lumpy for such a small project, I've basted the backing fabric and the cross stitched fabric together using a bright purple thread along the pulled thread. This basting thread can easily be pulled or cut out after the machine stitching.


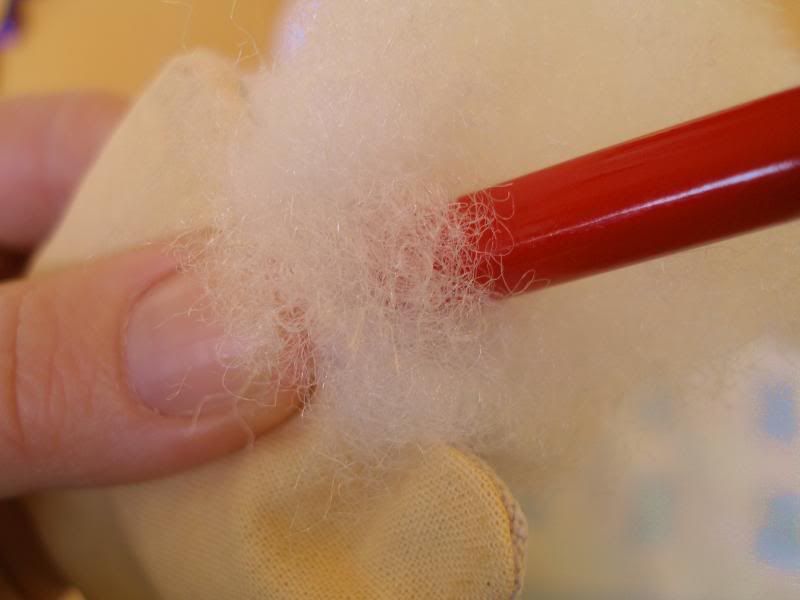
After the machine stitching, clip the corners before you turn the fabric right side out. This will prevent excessive bulkiness. After the cushion is turned right side out, lightly stuff it. A chop stick is great for getting stuffing into the corners. ;)


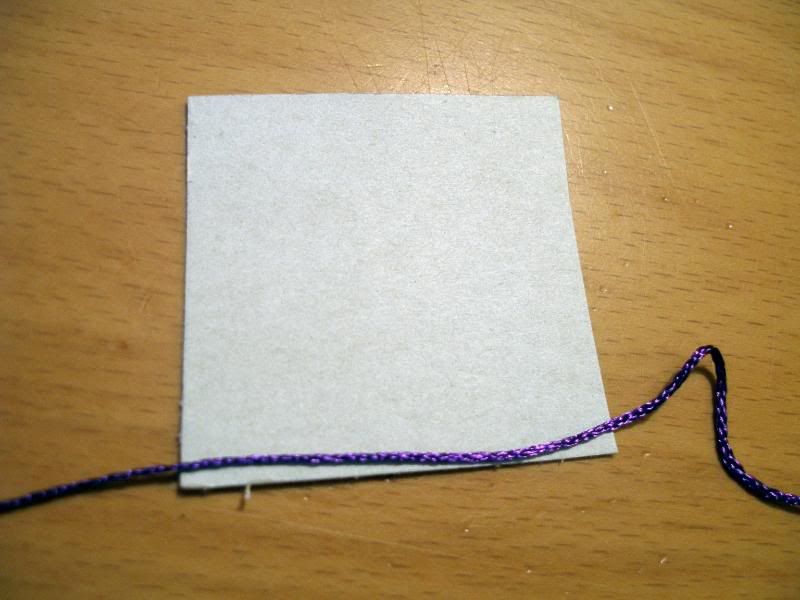
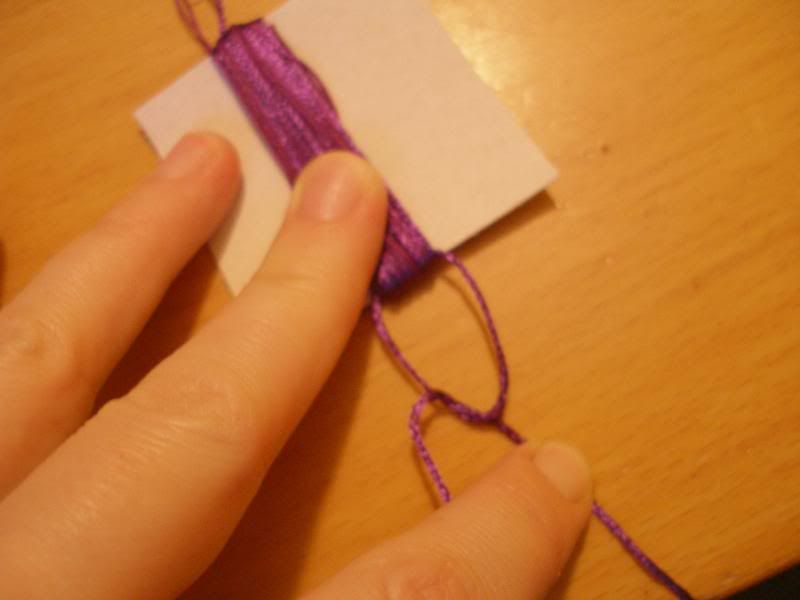
Before you can close your bookmark, you need to make a tassel and attach that to a ribbon. I've used a large bead to disguise the join between ribbon and tassel. Making a tassel is easy, you just need a form to wind the floss around. For my tassel, I've cut a piece of cardboard about two inches wide (along the winding edge). I'm using two different flosses in my tassel - get creative and try different colors, different textures, etc.! Before you begin winding, make sure you have a loose piece of floss in place. This will be used to tie the top of the tassel and eventually to form the 'neck' and 'head' of your tassel. Begin winding with the tail of your floss at the edge of the form opposite from this loose thread.


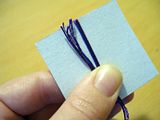
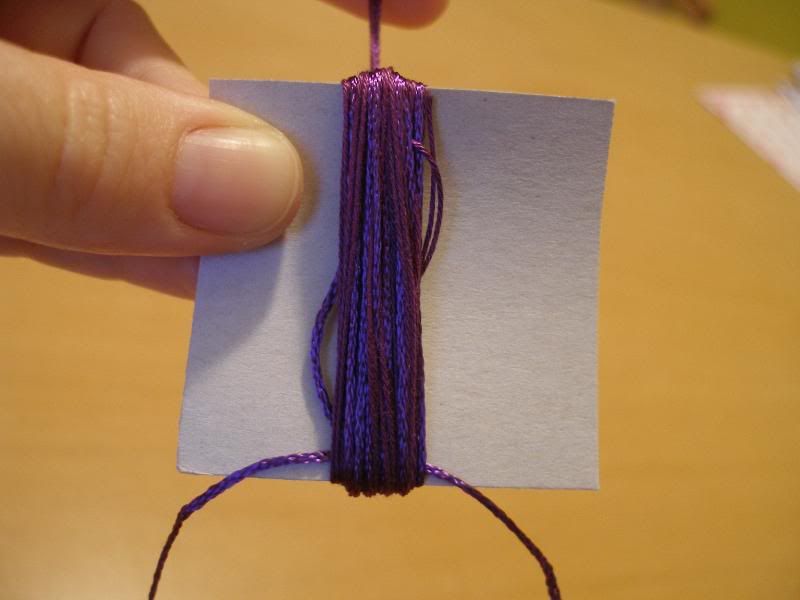
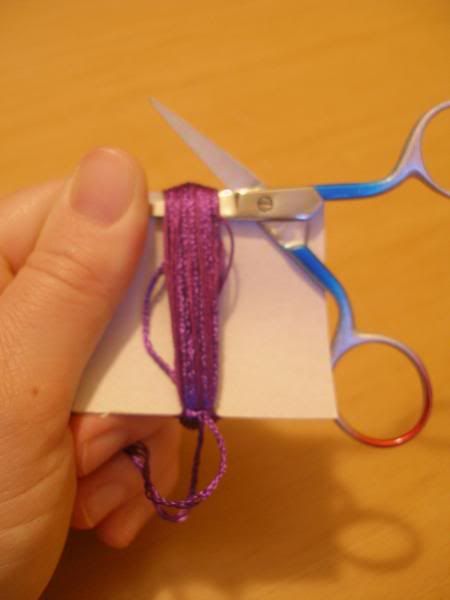
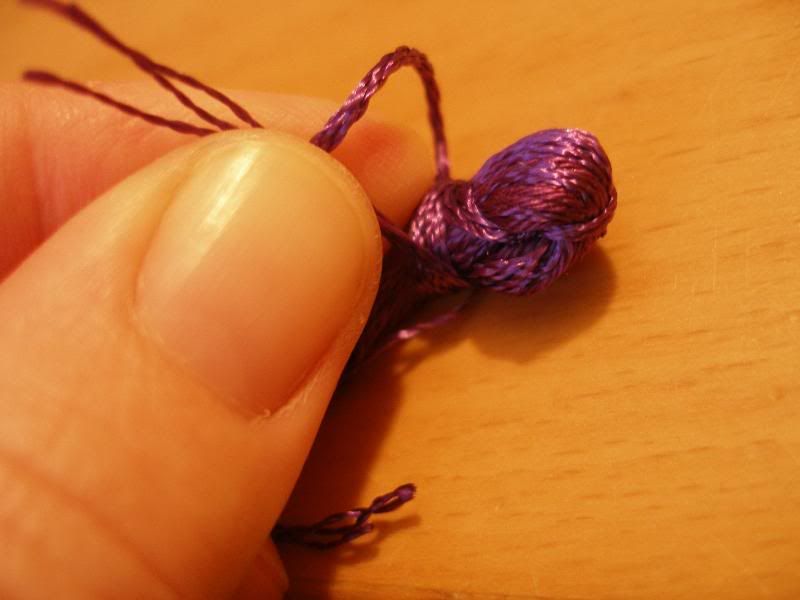
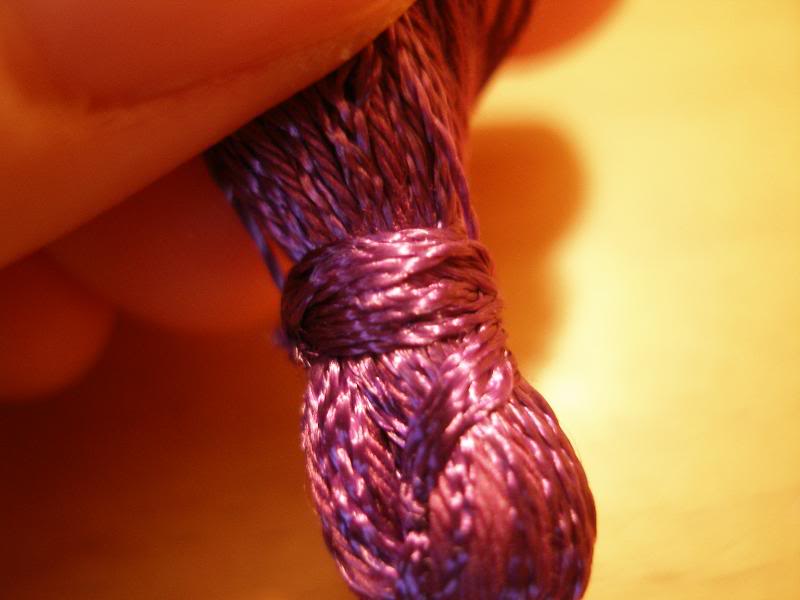
When you're finished winding floss over your form, end on the edge that's opposite the loose thread and cut this tail even with the form. Use the loose thread to tie the top of the tassel tight. Cut the bottom edge loose from the form. You will have something that resembles the final photo.


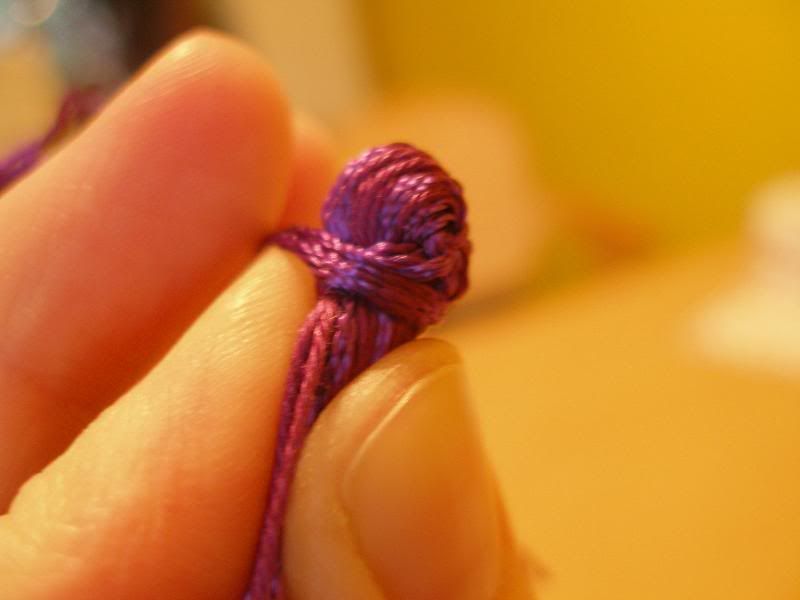
Now bring that loose thread down over the top of the tassel and begin winding it in a sort of band to create the neck of the tassel. When your neck is tight and you like how it looks, tie this loose end securely and clip it. Now you have a tassel - congratulations!


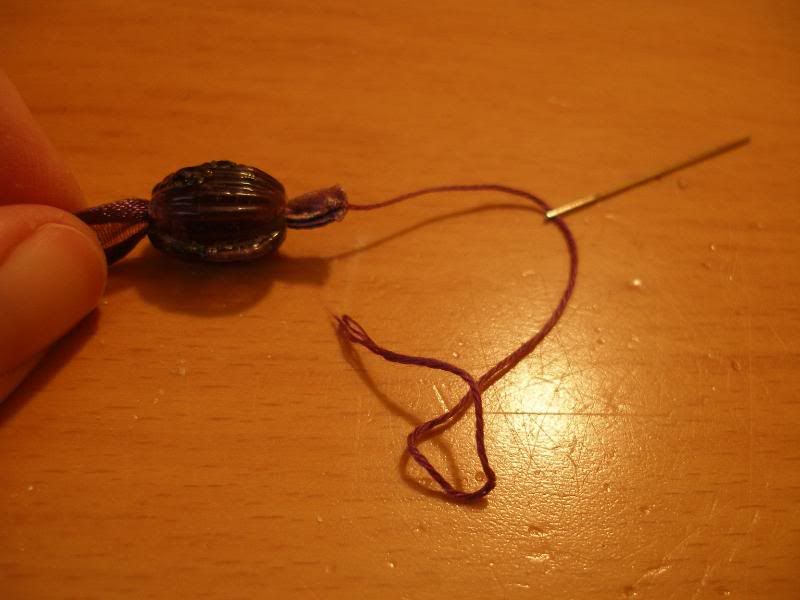
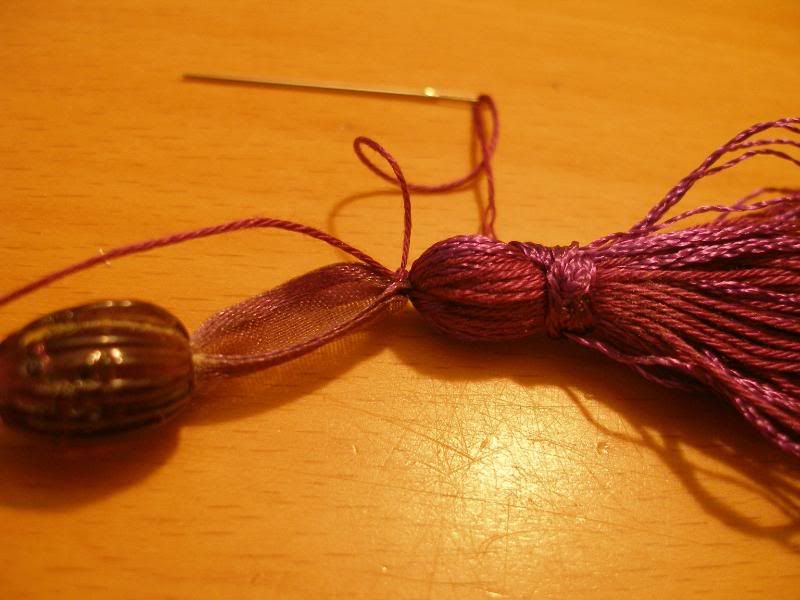
Next, you need to attach the tassel to the ribbon. The ribbon will be the part of the bookmark inside the book, so choose a length that will fit comfortably inside the average size book you read. Paperbacks will only require a fairly short length, whereas special editions, coffee table books, etc. will require a longer piece. If you are using a bead, string the ribbon through the bead before you attach it to the tassel. Run a loose thread through the head of the tassel, run a separate piece of loose thread through the ribbon, and use these loose threads to sew the ribbon and tassel together. Slide the bead over the join to disguise it.


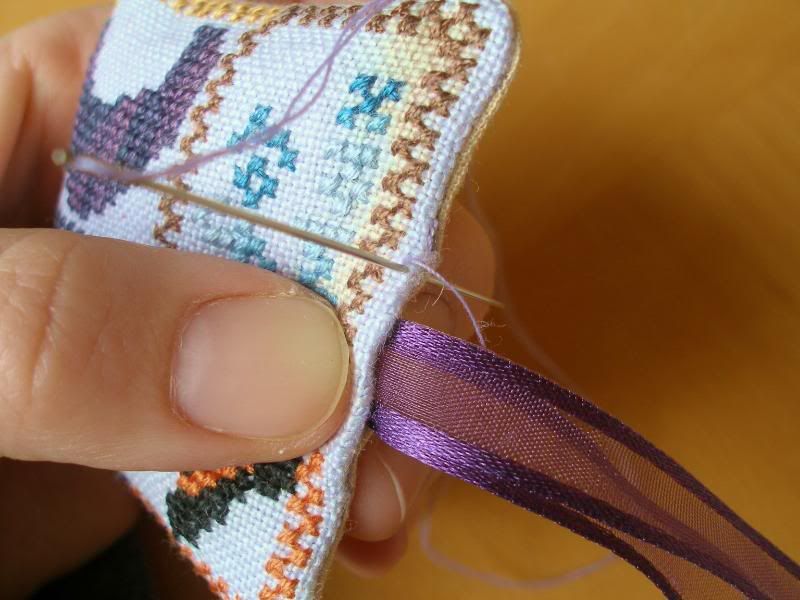
Now you can slip the other end of the ribbon into the cushion opening and hand stitch everything closed. Voila, a very lovely bookmark that really is a work of art. :)


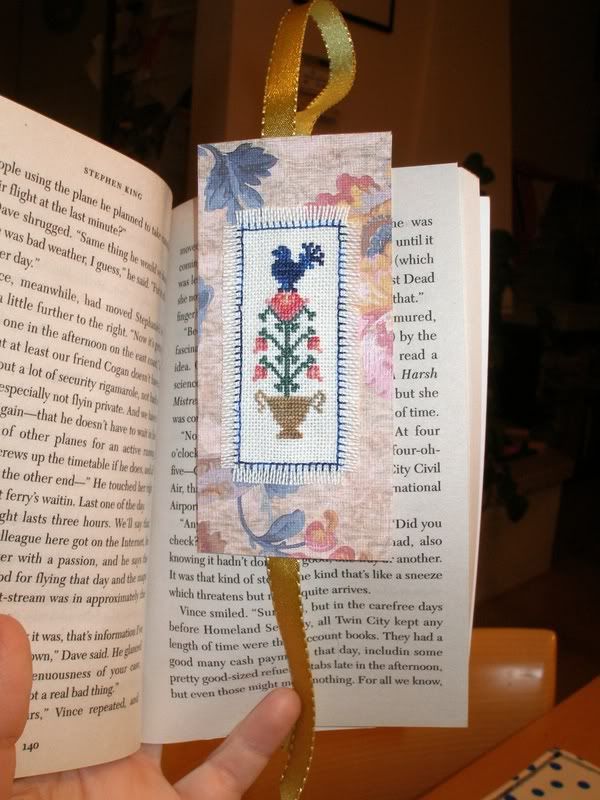
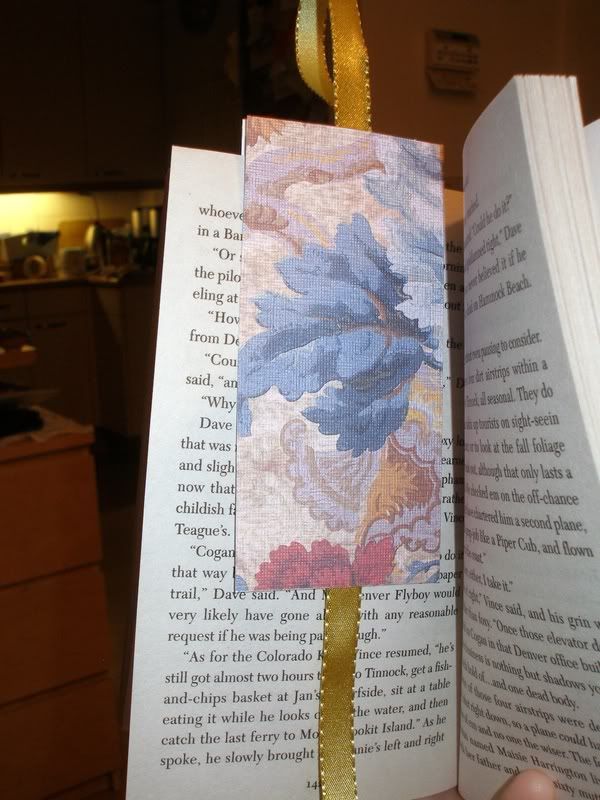
a magnetic bookmark using cardstock

And finally, a very practical bookmark that will keep your place even if you drop your book or if one of your kids 'helps' you by moving your book around. The magnets in this bookmark are more persistent than clumsy fingers or helpful kids. ;)

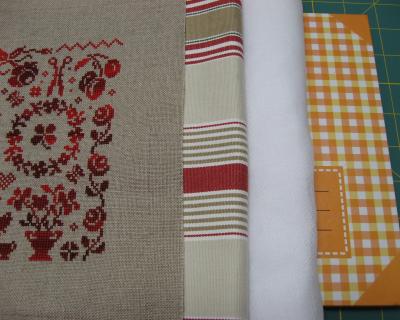
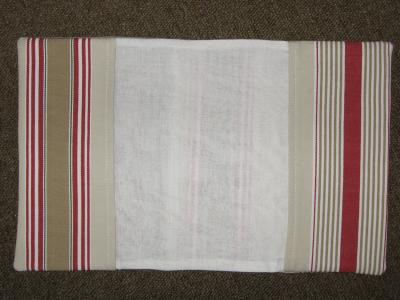
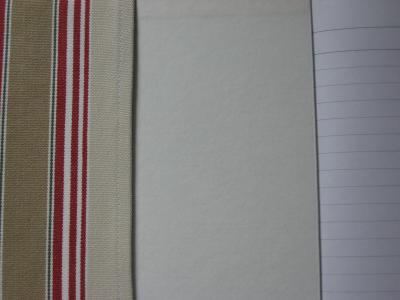
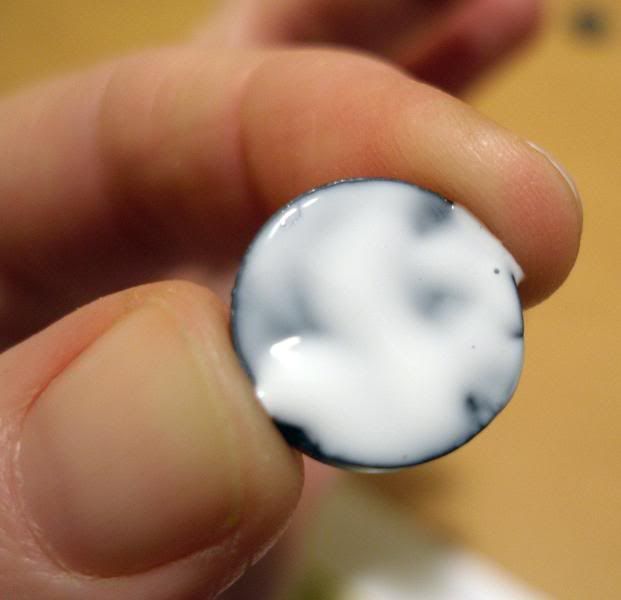
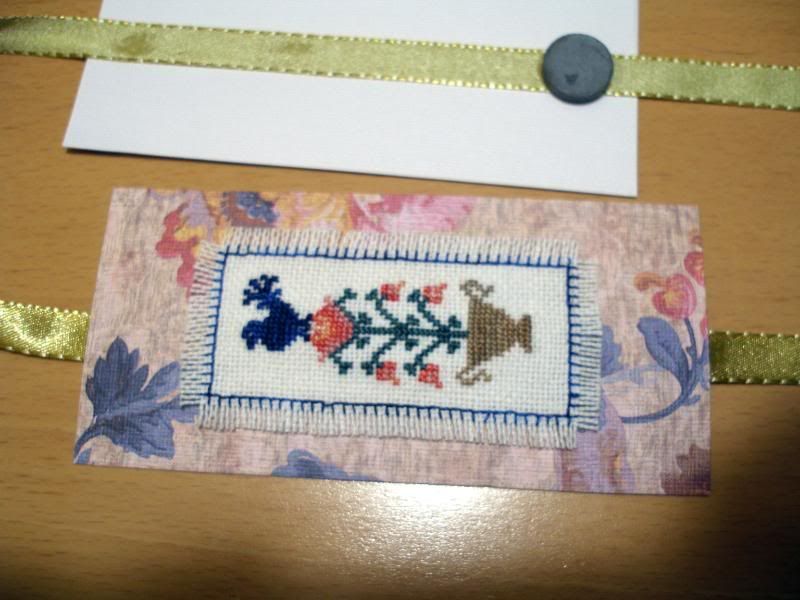
Here's what you'll need: two magnets, a length of ribbon, a small stitched design (mine's been hemstitched around the edges and I have ironed interfacing on the backside), two equal-sized pieces of cardstock, and clear-drying craft glue.


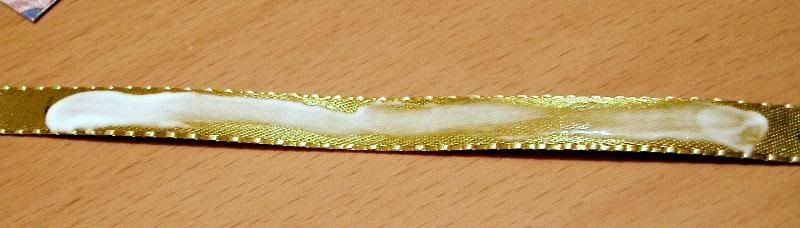
Apply glue to the ribbon where you want to mount the cardstock. I suggest making light marks on the ribbon to get the glue in the right places. ;) After the cardstock is glued to the ribbon, apply a generous layer of glue to the magnets and attach them to the ribbon, as shown. Make sure that you glue the magnets on so that the sides that 'like' each other are facing each other. Otherwise your bookmark will never close. LOL!


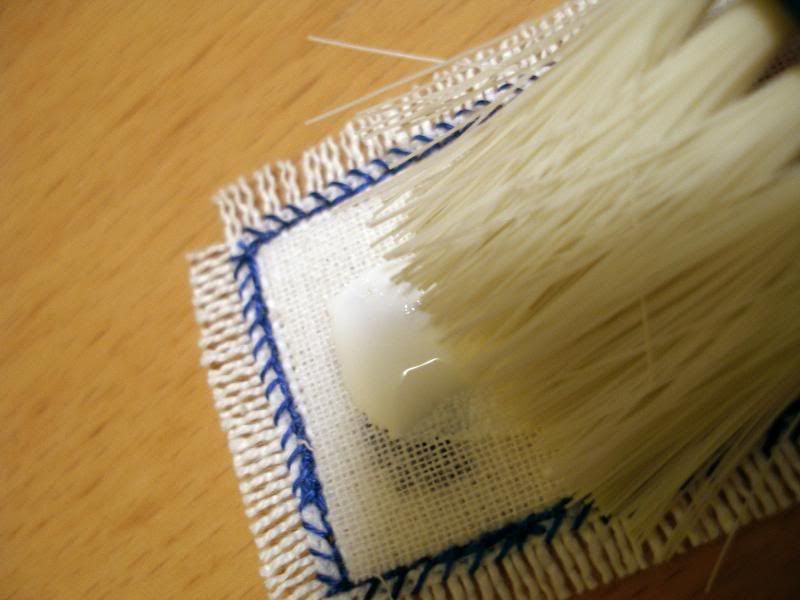
After the glue for the ribbon/cardstock/magnet arrangement has dried, apply a generous (though not thick) layer of glue to the backside of the stitched piece. This is why you need interfacing on the back side - otherwise, the glue will go right through to the stitching. I use a brush to keep the layer even and to get it right to the edges. Affix the stitched piece to the right side of the front piece of cardstock and let it dry.


Voila! A lovely, practical bookmark you can enjoy for years to come!


Tutor = BarbaraCL
 

Made by Lena