
Materials Needed:
• Whatever you'll be using for your stitched piece. You choose the design, fabric, embellishments, etc. Stitched pieces should be approximately 3-4" square. If you want the back cover stitched, you'll have to take that into consideration also. Size is approximate. You can make it larger, smaller, rectangle, square, etc. It's up to you!
• Coordinating cotton fabric of your choice. I've found that the quilt fats (18x22" fabric) are perfect. Or look in the odds and ends bin at the fabric stores to see if there's anything that might work. If you want pockets on the inside of your needlebook, you'll need two pieces of fabric. This is the fabric that will go on the inside of your needlebook, so the size depends on the size of your stitched piece, and whether or not you stitched a back cover.
• Matching 1/4" ribbon. Shouldn't need much more than 14".
• Flat quilt batting - again, the amount depends on size of needlebook. 1/4 yd. should do it.
• Piece of coordinating felt. 5x8" piece should work.
• Coordinating thread to sew it all together.
• Scissors to cut fabric, batting, and felt.
• Sewing Machine. You can sew it together by hand, but a machine makes it go faster and easier.
• Iron
Step One:
Decide on what to stitch for your needlebook cover.

Step Two:
Choose coordinating fabrics for the back cover and inside cover. Cut the back cover the same size as the front cover. Cut the inside cover the same height as the front/back cover, and twice as wide minus 1/2". Cut the quilt batting the same size as the inside cover (Quilt batting not shown in pic). Press all the pieces with an iron, except for batting.

Step Three:
Take front cover and back cover and place right sides together. Stitch right hand side with 1/4" seam allowance.


Step 4:
Press seam open.


Step Five:
 Here's where the fun part starts! Assemble your pieces. Front/Back Cover, Inside Cover, Batting, Ribbon.
Note: If you want to put pockets inside your needlebook, you will have to cut a piece of fabric the same width as the Inside Cover, and 2/3 the height PLUS 1/2". Fold 1/2" to the wrong side of the fabric, along the LONG edge. Press flat with iron. On the same long side of fabric, stitch a seam 1/4" from folded over edge. Place Pocket with right side down on table. Place Inside Cover on top with right side down, matching bottom edges. Make 1/4" seam on each short edge. The drawing shows what it should look like with the right side facing you. (There are no pics because I didn't put pockets in this one).
Take your Inside Cover and place it right side down on table. Place batting on top. Set aside.


Place your Front/Back Cover right side up (stitching facing you). Cut two pieces of ribbon 6-8" each. Place ribbon on right and left side of cover. You may want to (temporarily) pin the ribbon in place. There are no pics of this part because I forgot (!!!) to put my ribbon on and had to improvise. However, I have relied on my artistic talents to draw a diagram.

Place the Inside Cover/Batting on top of the Front/Back Cover and Ribbon. You may want to pin all three layers together to make sewing it together easier.


You will want to leave a 3" opening at the bottom of your needlebook so that you can turn it inside out. Notice where I started my seam?

Stitch 1/4" seam all the way around the edge of the needlebook, stopping about 3" from where you started. Notice where I stopped?

Once the sewing is done, you can remove the pins. This is what your needlebook should look like once you've sewed the outside seams.

Trim the batting close to the seam. Be careful not to cut the fabric. Once you've trimmed the batting, cut the corners at an angle. This is what it should look like.

Step Six:
Carefully turn your project inside out. Your Front/Back Cover, Inside Cover, and Ribbons should be on the outside. The batting should be on the inside. To help get your corners "pointy", use a slim object to push them out. I used a wood skewer. You can also use a knitting needle, crochet hook, pen with a cap on. Be careful not to poke the object through the fabric.


Using the iron, press the front and back of your needlebook. You will have to tuck in the fabric where the opening is at the bottom of your needlebook.

Step Seven:
Take needle and thread to sew the opening closed. Press both sides of your needlebook again.


Step Eight:
Cut felt 1/4" smaller than the inside of your needlebook. One piece of felt will make 2 pages. If you wish to have 4 pages, cut 2 pieces of felt. I personally wouldn't do more than 4 pages as it would make the needlebook pretty bulky. Optional: I used pinking shears to cut the edges of the felt.

Place felt in the center of the needlebook. Use pins to hold it in place.


Place needlebook on sewing machine with felt side down and Front/Back Cover facing up. Stitch a line where the front and back covers are seamed together.
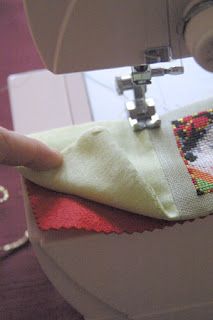
This is what it should look like when the felt page(s) are stitched in.

I hand-sewed on the gold cording to match the closure. Tie the ribbon and viola, you have a finished needlebook!


Here are other needlebooks I've made:
Je Brode/I Embroider
Friendship Grows
Here are needlebooks created from my tutorial: More Needlebooks
If you have any questions, feel free to email me at mearitaira@yahoo.com.
Tutor = Meari


2 comments:
I love this! Thank you for posting.
Какая игольница! Просто прелесть!
Post a Comment