Friday, October 19, 2007
Embellished Bag - Class
Welcome Everyone to the Embellished bag class weekend. All the pictures are clickable and shall lead you to a larger view.
You can see the list of materials needed
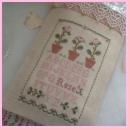
Step 1: Cut backing fabric slightly larger than stitched piece, For this particular design I have allowed 5cm from the edge of the design to the seam and 1cm for my seam. For the top allow the depth of your lace plus a further 5cm for turning over to make the top neat. - As you can see ffrom my picture I didn't remember to allow extra at the top and so had to make a cuff.
Step 2: Either hand sew or machine stitch the 2 sides and the bottom together
Step 3: Trim the corner so that when you turn it to the right sides and gently push the corners out they won't be bulky
Step 4: Turn the bag right sides out.
APOLOGIES EVERYONE - I cannot seem to get pictures to upload; Wordpress and I don't seem to get along so I will have to continue without pictures.
Step 5: Measure the top of your bag (mine was 15cm) and cut your lace that size. Pin or tack your chosen lace to the top of the front of your back, then handsew into place only going through the lace and the front of the bag.
Step 6: Pin or tack your ribbon or cord for the handle (this should be cut to your chosen size), either to the inside of the bag where you can't see the tails or to the outside of the bag where you will see the tails, then handstitch into place securely.
Step 7: Measure the size of the bottom of your bag and cut the beaded ribbon to size. Pin or tack into place on the back of your bag at the bottom so you can see the beads hanging down. Hand sew into place.
Step 8: I added some tiny glass beads to the ends of my lace for extra adornment. You could do the same.
This type of bag lends itself to all sorts of designs and sizes and trims. Let you imagination run riot instead of beads and lace you could add tassels and pom poms, ribbon and cording etc etc.
I really hope this was clear. If not, please feel free to ask any question by posting in the comments.
Remember too that this is my way of making these bags I'm sure there are other easier ways than this, but this is how I do them.
If you do make a bag please share it with us all so we can see.
Tutor = Su
Subscribe to:
Post Comments (Atom)


No comments:
Post a Comment